Snapseed is one of the most popular Photo Editing application for Smartphone users and available on Android as well as iOS. And it's popular for right reasons. I have been using Snapeed for many years now and love processing photographs on Smartphone. Recently many of us using Phone cameras to click photographs and what can be better than having an app on phone for editing. This Blogpost would introduce you to Snapseed through a step by step editing guideline & that's how you would get to know what all it offers and how to make good use of tools available in this app.
This screenshot shows how a photograph looks after opening in Snapseed. On opening, it shows previews of some default looks it offer. You can tap on any of the look and see how your photograph looks and chose the most appropriate one. If you are happy with results of a look, you don't need to spend lot of time with other tools. On many of the photographs, Looks bring huge difference in photographs and that too in seconds.
In bottom part of the app notice 3 sections of Snapseed and 'LOOKS' is enabled when you open a photograph. The other 2 are - TOOLS and EXPORT.
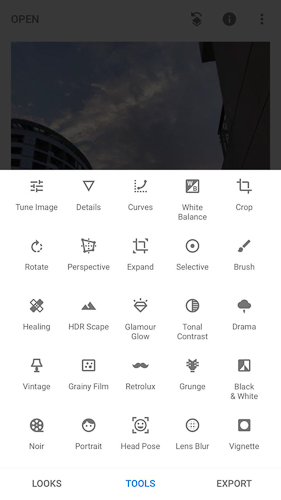
This Screenshot from Snapseed app shows all options you see when you Tap on TOOLS option in Snapseed and many of the options you see would match with any other Photo Editing app for Smartphones, Desktop or web with few exceptions. The tool-set that you get in Snapseed are:
1. Tune Image
2. Details
3. Curves
4. White Balance
5. Crop
6. Rotate
7. Perspective
8. Expand
9. Selective
10. Brush
11. Healing
13. Glamour Glow
14. Tonal Contrast
15. Drama
16. Vintage
17. Grainy Film
18. Retrolux
19. Grunge
20. Black & White
21. Nour
22. Portrait
23. Head Pose
24. Lens Blur
25. Vignette
26. Double Exposure
27. Text
28. Frames
And there are multiple of suboptions inside these TOOLs. In this post, we will share about some of the tools we used fro editing this photograph.
For the photograph we chose for this blogpost, the very first tool we used is 'Perspective', which helps in aligning different elements of the photograph by helping in correcting vertical/horizontal perspectives, rotation along with Scale/Free. In this photograph you can see that buildings are tilted inwards and I wanted them to look straight. So we used Vertical perspective by swiping the finger vertically - upwards or downwards depending upon the need and when achieved desired results, clicked on tick icon in right bottom of the screen.
Perspective Tools in Snapseed is super useful for Architecture photography - for Interiors as well as exteriors.
Following video explains about Perspective in Snapseed with another good example of photograph clicked in Las Vegas -
....
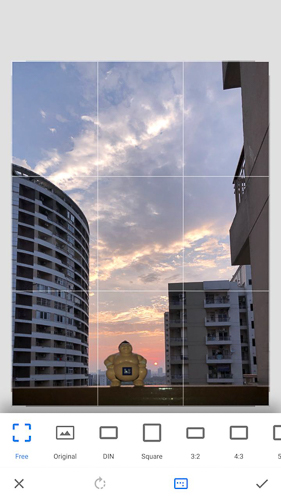
After correcting Perspective, we cropped the photograph to removed some of the unwanted elements. At times, perspective correction leads of noise around edges so crop helps in those cases to remove those pieces.
When you enter into Crop tool in Snapseed, you see multiple options like keeping original aspect ratio, cropping as square or in different proportions. These are helpful when you are creating a photograph for a particular purpose & need a particular aspect ratio.
Let's talk about one of the most basic yet most impactful tool in Snapseed which can transform your photographs in a very elegant way.
We are talking about very first options in Tools section of Snapseed - 'Tune Image'. In this option you play with following things in a photograph :
1. Brightness - To increase of decrease overall brightness of your photograph.
2. Contrast - To make photograph intense with high contrast or soft with low contrast. (More specific definition of Contrast in Photography can be - Contrast is the difference in luminance or colour that makes an object distinguishable. In visual perception of the real world, contrast is determined by the difference in the color and brightness of the object and other objects within the same view.)
3. Saturation - This tool in Snapseed helps in enriching colors of the photograph or making colours look dull, or even turn colours into black & white. Although there is another tool for Black and White processing of photographs in Snapseed.
4. Ambiance
5. Highlights
6. Shadows
7. Warmth
These basic tools are same across most of the photo editing tools and following video will help you understand each of these well (Exposure in this video is Brightness of Snapseed) -
....
Master these basic tools of Snapseed and any kind of Photography genres can be taken care by these tools.
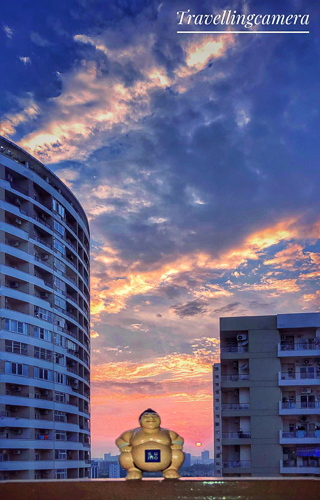
Now in this photograph I wanted to only edit the Sumo doll and not everything, so 'Selective' tool is the one to use in that case. Select this tool and tap on the area you want to edit. When you tap on the small circle, it shows you few options to adjust - Brightness, Contrast, Saturation and Structure. You can select one of the sub-options at one time and then use slide right/left to chose right amount of brightness, contrast, saturation and structure. It will only change the selected area and in above photograph, its the doll.
Now that I am done with post-processing of this photograph in Snapseed, it's time to add some text. There is Text tool, just tap on it, double click on the template-text, type what you want to write. Now you can also move this text and resize. I chose top right corner to place 'Travellingcamera'.
Finally when you are done with desired changes in your photograph, now it's time to export your photograph to have a new image with all changes made in Snapseed. For that go to third option next to Tools - Export. When you use last option in Export options, new photograph is created in Snapseed folder inside photos on your phone.
With that your processed photograph is ready to be used on your website, blog, social media or some other usage like print or sending to your client.


.jpg)
Comments
Thanks for the useful tips.